Description
This guide will review the configuration aspects and prefernece you will find in Asternic CDR Reports Standalone. The software is quite configurable and works accross several versions of Asterisk and web frontends. We are currently working on this guide and adding sections every day. It is a work in progress.
Although there is inline help in the software itself, we will try to describe here every configuration setting and its meaning in this guide, together with a review of the user and authentication system provided and the report desinger.
Login in
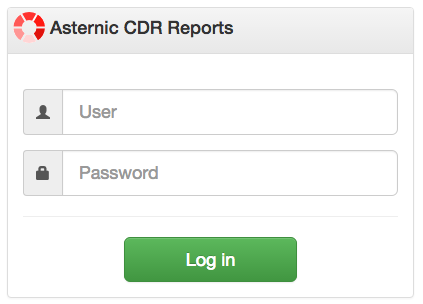
Once Asternic CDR Reports is installed and activated with either a trial or purchased code, you should point your browser to http://your.server/cdrstats in order to log into the system. You will be presented with a login form similar to this:
In an IssabelPBX based installation, you will use the same user and password you normally use to log into IssabelPBX.
However, if you want to use the integrated user authentication system (separated from your configuration backend), then you must edit the file /var/www/html/cdrstats/config.php and set the configuration USE_BACKEND_AUTH to false:
// If FreePBX is installed, use its database auth system by default
//
// To set up usernames, passwords and allowed extension ranges directly
// from this application, set it to false.

define('USE_BACKEND_AUTH',false);
The default administrator user when using the built in user system is admin with password admin
NOTE
You should change the administrator password the first time you login to prevent unauthorized use of the software. Read the section Managing Users to see how to do that.
Once logged in, you will have access to the main dashboard, and at the top of it access to the Setup menu, where you will reach all the administrator management pages.
Setup Menu
The Setup menu at the top will display all available options for setting up system preferences.
Preferences
The preference page will let you add, modify or delete configuration parameters. The setting system in Asternic CDR Reports is setup in a way you can define some configuration parameters as global or individualized to some particular element, by means of using a system similar to named arrays in programming, where the main option name is set in the keyword field, the optional modificator in the paramter field, and the actual setting of that preference on the value field. Read the next section to understand basic usage of the setting system.
chart_colors
Comma separated list of hex colors to use for bar charts.
chart_height
CSS height for bar charts. Default is 450.
csv_delimiter
Field delimiter for CSV files.
date_format
Format to use in deatiled report date field using MySQL syntax, for example: %m-%d-%Y %H:%i:%s
detailed_report_server_side
Use server side processing for the detailed report. This is needed if you want to export large datasets. Server side processing only offers CSV export options, while the normal mode offers CSV, Excel and PDF export options.
group_by_accountcode
Use the accountcode field on the CDR table for the group reports
group_by_extension_group
Use the group field that you can set on the Extensions configuration page (instead of the account code) for the group reports
hide_cost_column
Do not show destination and cost columns on reports. If you are not doing call tarif, you might want to set this to 1 to hide those unused columns.
ignore_short_duration
If you want to ignore calls with durations shorter than a specific number of seconds, then use this setting. For example, if you chose to ignore calls less than 5 seconds long, set this to 5. Calls shorter than this value will be completely ignored.
money_decimal_places
Number of decimal places to show on call cost.
money_decimal_point
Decimal point to use in formatting price/cost numbers. Default value is .
money_symbol
Character or string to use as money symbol.
money_thousand_separator
Thousand separator to use in formatting price/cost numbers. Default value is ,
pdf_footer
HTML Footer to use on PDF exports.
pdf_header
HTML Header to use on PDF exports.
recording_field
Field to use in the CDR table to look for the file recording.
recordings_basedir
Base directory for recordings, used for security reasons. If any file attempted to download does not match this setting download will be denied. The default value is /var/spool/asterisk/monitor.
recordings_path
Base path for recordings (Use this if the recording filename in the DB does not include the full path but only the filename).
Extensions
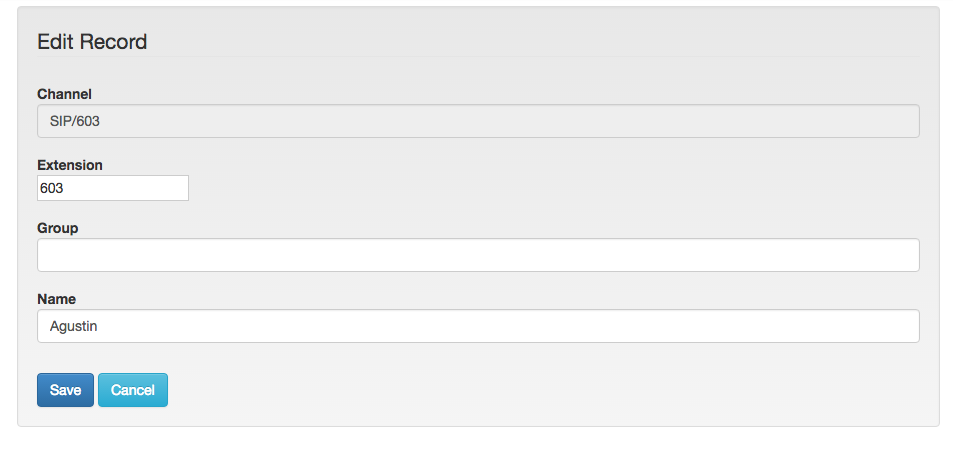
This section lets you configure your backend Extensions. They are auto discovered and devices added automatically, but then you can change their name or configure a specific group for them if you want.
Users
Asternic CDR Reports includes a user authentication and authorization system that will be available by default if you are not using popular Asterisk configuration GUI. If you use such configurator and want to use it, then you must edit /var/www/html/cdrstats/config.php and set USE_BACKEND_AUTH to false.
Authentication is done using a username and a password, while authorization is managed using access tokens for separating an administrator from a regular user. Users can also be limited to see certain extensions in their reports, so you can separate deparments or different tenants quite easily.
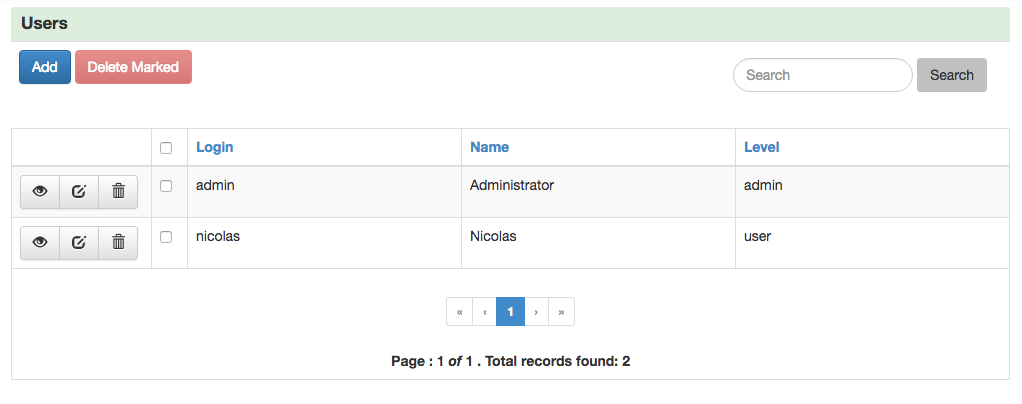
The first this you will see when editing users is the administration screen:
NOTE
It is very important for you to change the admin password as soon as the software is installed.
You can click the edit action icon on any entry to modify it:
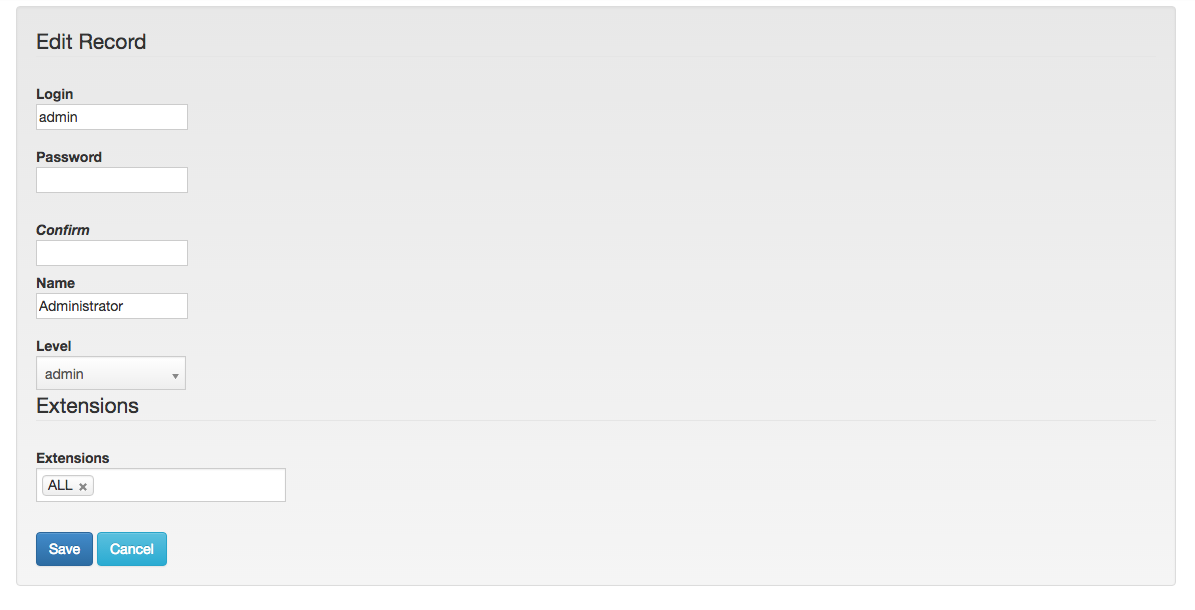
As you can see, modifying a user password, or the allowed extensions is quite simple to do.
The Level field lets you assign Access Tokens. To give full access to a system, you usually need to assign all available tokens to a given user. A token grants access to resources based on the Access Control definitios.
Rates
Asternic CDR Reports can calculate the cost of your calls. For that to work you must setup the call rates in this section. Only outbound calls are rated, based on the dialed number prefix. For a reliable call rating you must have a standarized/normalised set of numbers so the rate lookup is done correctly.
As you can see in the following screen capture, there are two rates defined, using the respective country codes as the prefix.
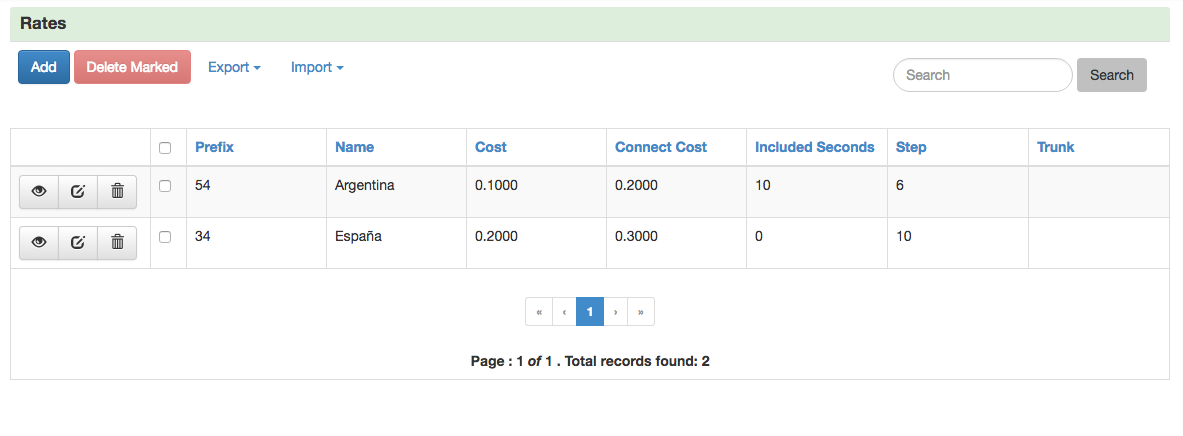
Any normalised number starting with those prefixes will have its rate applied. Longer prefixes take precendes over shorter ones. So you can have 54 for 'Argentina', and '549' for 'Argentina Mobile' with different rates each, and if a call is made to a number starting with 549 then the mobile rate will be applied.
This are the fields you have available for the rates table:
- prefix: dialed number prefix to match
- name: name of the destination to show on reports
- cost: monetary cost to apply for each tarif 'step'
- connect cost: monetary cost applied just for establishing the connection
- included seconds: grandfathered initial seconds to count upon call establishment (non rated seconds)
- step: interval in seconds to calculate cost ( step * cost )
- trunk: trunk for which the rate applies, if empty it is the global or default value.
Normalisation
In order for the rates to be applied correctly, the dialed number prefix must be normalised.
For example, you must have local calls being dialed just by an 8 digit number, and international calls with a 011 dial prefix following the country code. So you might dial a local number like:
54114322
And an internation number like:
011541133234367
For the system to be able to find a call rate based on a prefix, the above makes not much sense and is subject to ambiguity. For that reason you must define normalisation rules. You might have other dialing rules, like using 9 as an outbound dial prefix. In this case you must strip that 9 and append the country code at the begining.
Any number after being normalised should have its country prefix at the front, constructed in a way that won't have any ambiguity for the relation. Assuming both of the above numbers are from Argentina, one being dialed as an internation call, the other one as a local call, the numbers should be normalised to look like:
541154114322
and
541133234367
That way we will know that in both cases the first two digits match the country code.
Here is the screen to enter a new normalisation rule:
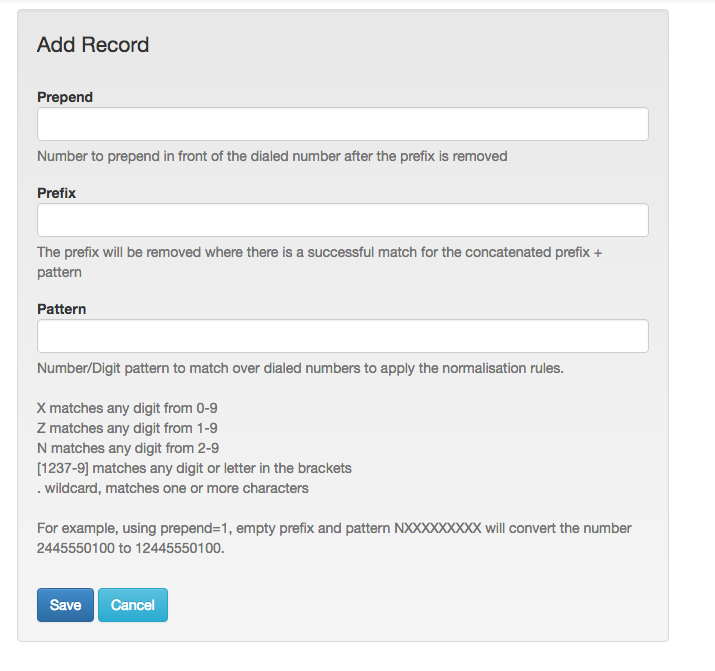
Every field is described in the same form:
- prepend: Number to prepend in front of the dialed number after the prefix (defined below) is removed.
- prefix: Prefix number to remove when there is a match on prefix + pattern (for example 9 if you use 9 as a dial out prefix)
- pattern: Pattern match of the dialed number, using Asterisk pattern matching conventions.
For example, using prepend=1, empty prefix and pattern NXXXXXXXXX will convert the number 2445550100 to 12445550100.
As normalisation is kind of complex, there is a section in this section to test rules. Just type a number as it is being dialed on the system, and the normalised version will appear on the same box:
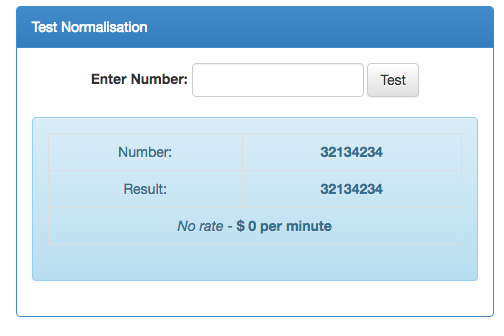
It will not only show you how the number is being normalised, but also calculate a call cost for it. This tool is really handy to test your normalisation and rate entries.